
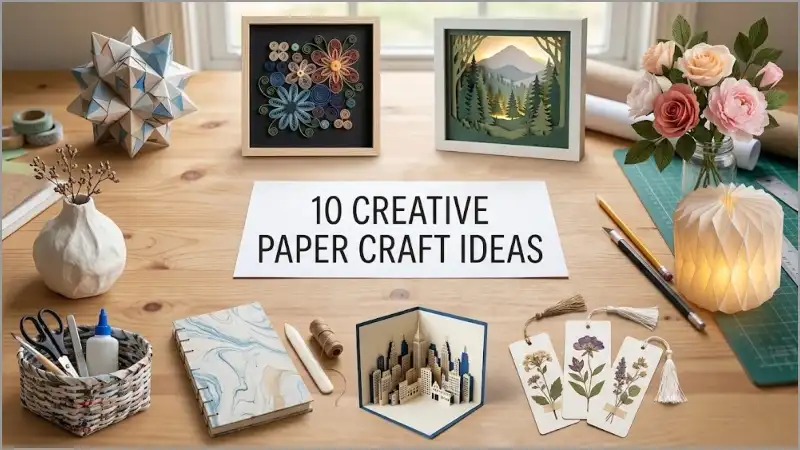
Paper is one of the most versatile, budget-friendly mediums available for artists and hobbyists alike. Whether you want to declutter your mind, decorate your living room on a budget, or create a personalized gift, exploring new paper craft ideas offers an accessible entry point into hands-on creativity.
You do not need an expensive setup to make high-quality decor. With basic materials like scissors, craft glue, cardstock, and a bone folder, you can turn plain paper into functional objects and structural art.
Essential Tools to Get Started
Before diving into specific projects, assembling a clean, functional toolkit ensures smooth folds and clean cuts.
-
Precision Craft Knife & Cutting Mat: Essential for intricate cuts that standard scissors cannot manage smoothly.
-
Bone Folder: Creates crisp, professional creases without tearing the paper fibers.
-
Paper Weights (120gsm to 220gsm): Standard printer paper works for folding, but heavy cardstock is vital for structural projects.
-
Quick-Dry Tacky Glue: Dries clear and prevents thin sheets from warping due to excess moisture.
1. Origami Modular Sculptures
Modular origami takes traditional paper folding a step further by interlocking multiple identical units to build complex, three-dimensional geometric shapes.
Unlike basic single-sheet models, modular designs create sturdy display pieces like starbursts, polyhedrons, and geometric globes. Start with 150gsm colored paper to ensure the locking tabs remain stiff during assembly.
2. 3D Quilled Wall Art
Paper quilling involves rolling, shaping, and gluing narrow strips of paper to create intricate visual designs.
To create a striking piece of quilled wall art:
-
Cut 3mm-wide strips from lightweight colored cardstock.
-
Use a slotted quilling tool to coil the strips into tight spirals.
-
Pinch the coils to form teardrops, leaves, or geometric shapes.
-
Glue the shaped coils edge-down onto heavy canvas board to build floral motifs or abstract patterns.
3. Layered Paper Shadow Boxes
Layered shadow boxes use depth and negative space to form detailed 3D scenes. By stacking cut paper sheets with foam adhesive spacers between each layer, you create dynamic shadows and realistic foreground-to-background transitions.
| Layer Stage | Component |
| Layer 1 | Outer Frame & Foreground Elements |
| Layer 2 | Midground Subject / Silhouette Cutouts |
| Layer 3 | Background Texture & Light Source |
Using silhouette cutouts of landscapes, forest scenes, or city skylines yields high-contrast artwork ready to frame.
4. Crepe Paper Botanical Flowers
Real flowers fade within days, but handcrafted crepe paper blooms last indefinitely. High-stretch Italian crepe paper allows you to curl, cup, and shape individual petals to mirror real botanical structures.
Pair hand-shaped petals with floral wire and floral tape to build realistic peonies, roses, and eucalyptus stems.
5. Handcrafted Paper Lanterns
Lighting enhances texture, making lampshades one of the most practical paper craft ideas for home decor.
Using translucent vellum or heavy parchment paper, you can score and fold geometric accordion pleats that wrap around LED lamp bases. Note: Always use cool-burning LED bulbs with paper lampshades to eliminate heat hazards. Looking for more budget-friendly DIY project inspiration? Read our complete guide on creative home decor craft ideas.
6. Pressed Botanical Bookmarks
Combine paper craft ideas techniques with natural elements by creating custom bookmarks.
-
Collect small leaves, ferns, or flower petals and press them inside heavy books for five days.
-
Cut 200gsm watercolor paper into 2×6 inch strips.
-
Arrange the dried botanicals on the paper and seal them using clear Mod Podge or cold-laminate sheets.
-
Punch a hole at the top and thread a cotton tassel for a finished look.
7. Kirigami Pop-Up Greeting Cards
While origami focuses strictly on folding, kirigami incorporates precise cuts to make paper structures expand.
Creating a kirigami pop-up card involves scoring central parallel slits along the fold of a card base. When opened to a 90-degree angle, the cut sections push forward, creating built-in platforms for architectural pop-ups, step motifs, or surprise structural messages.
8. Hand-Bound Blank Journals
Bookbinding gives you total control over paper weight, grid style, and cover texture.
Using the simple kettle-stitch method, you can bind folded signatures (groups of 4–5 pages) together using waxed linen thread. Cover the outside with heavy chipboard wrapped in decorative marbled paper for a durable, custom notebook.
-
Fold paper sheets into multi-page signatures.
-
Punch uniform sewing holes along the spine using an awl.
-
Thread signatures together using a continuous kettle-stitch.
-
Glue heavy cardstock covers over the stitched spine.
9. Woven Paper Basketry
Paper basket weaving turns leftover newspaper, kraft paper, or magazine pages into functional storage containers.
Rolling paper sheets tightly around thin wooden dowels creates strong, flexible paper reeds. Interweaving these reeds in a classic over-under lattice pattern produces sturdy desktop organizers, plant pot covers, or fruit baskets. Coat the finished basket with a clear varnish to add water resistance and structural rigidity.
10. Papier-Mâché Sculptural Vases
Papier-mâché offers unlimited freedom for sculpting organic, modern home accessories.
By layering strips of newsprint dipped in a simple flour-and-water paste over an inflated balloon or cardboard armature, you build a rigid shell. Once fully dry, sand the surface smooth, apply a layer of gesso, and paint the vessel with matte acrylics to recreate the look of modern ceramic pottery.
How to Choose the Right Paper for Your Project
Using the wrong paper weight can ruin an otherwise solid technique. Match your project to the correct paper density:
| Paper Type | Weight (GSM) | Best Project Use |
| Origami Paper | 60 – 80 GSM | Complex folding, miniature models |
| Standard Printer Paper | 75 – 90 GSM | Practice folds, paper reeds, draft cuts |
| Drawing / Crepe Paper | 100 – 130 GSM | Paper flowers, quilling strips, lanterns |
| Light Cardstock | 160 – 220 GSM | Pop-up cards, shadow box layers, bookmarks |
| Heavy Board / Chipboard | 300+ GSM | Book covers, sculpture bases, structural frames |
Tips for Long-Lasting Paper Crafts
-
Work on a Clean Surface: Oils from your hands can discolor light-colored paper over time. Wash hands frequently or use cotton gloves when handling museum-grade projects.
-
Mind the Grain: Paper has a natural grain direction. Folding with the grain produces clean edges; folding against the grain causes rough, cracked creases.
-
Store Away from Direct Sunlight: UV rays break down paper fibers and fade dyed colors. Spray finished display pieces with a UV-resistant clear coat to preserve colors.
Exploring functional paper craft ideas allows you to test structural design concepts using simple materials. Start with a basic project like a shadow box or bookbinding, master the core cutting and folding techniques, and scale up to more complex 3D projects over time. If you enjoyed these DIY projects, check out our step-by-step guide on easy origami tutorials to master basic folding techniques.